Provisioning Overview
User provisioning is a critical component of modern IAM systems which allows organisations to manage and create user identities sourced from ITSM tools or a HR system. Manual user account creation can be time intensive and prone to errors. This is especially true as an organisation grows larger which increases the administrative burden of managing users account life cycles. Apporetum's provisioning functionality can be leveraged to manage creating, modifying, and deactivating user accounts across multiple systems.
Configure Environment Variables
- Navigate to the Apporetum Managed Resource Group
- Select the Apporetum API App Service
- Select Settings -> Environment Variables from the menu blade
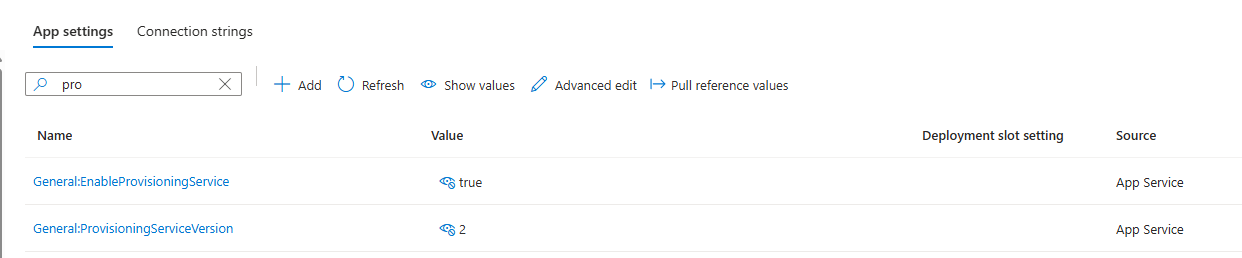
- Check if the following configurations are present in Application setting: General:ProvisioningServiceVersion and General:EnableProvisioningService
- If any of these settings do not exist, click on the +New application setting and manually add them. The names of these settings are case sensitive.
- Change the value of General:ProvisioningServiceVersion to 2
- Change the value of General:EnableProvisioningService to True
- Click Apply and Save
- This will restart the API Service and the environment variables will be set
Deploying Provisioning Agent
Apporetum leverages Microsoft's API-driven provisioning to Microsoft Entra ID via Enterprise Applications. For the deployment of the agent, you will need the following roles:
- Application Administrator
- Hybrid Identity Administrator
There can only be a maximum of 2 automatic provisioning agents per tenant.
- Navigate to Enterprise Applications in the Microsoft Portal
- Select + New Application
- Search for API-driven provisioning to Microsoft Entra ID and select the application
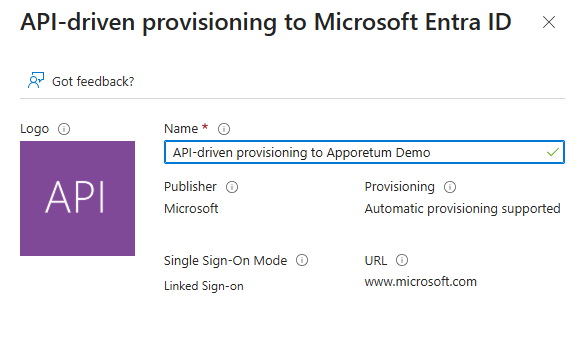
- Select Create
Take note of Application ID and the Object ID displayed. This information will be used in the provisioning set up
-
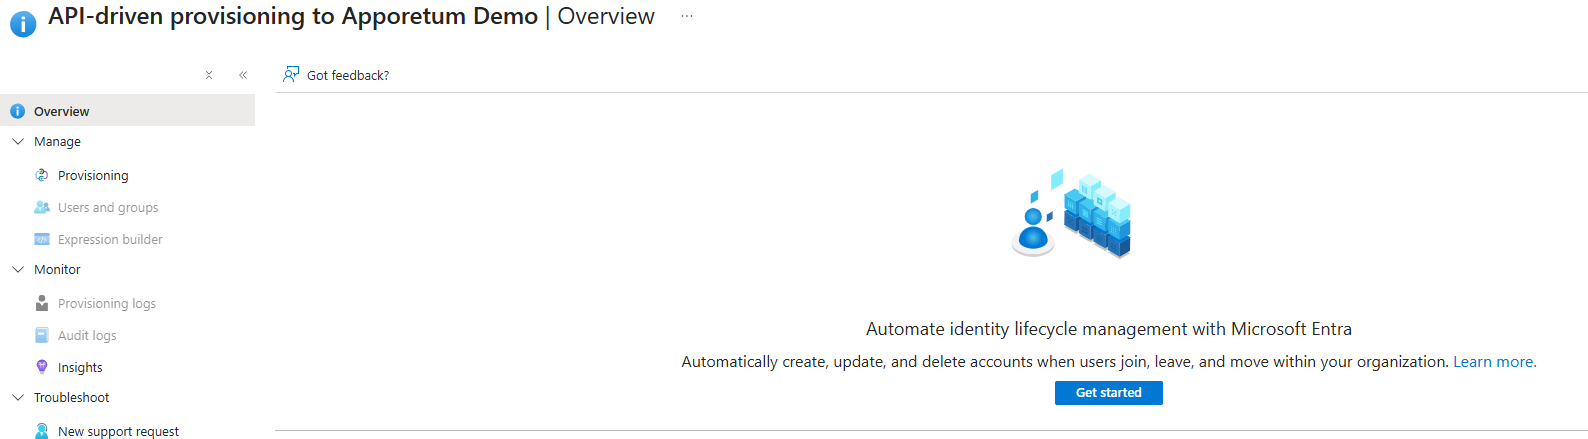
Under the Manage blade, select Provisioning
-
Click on Get Started to configure the provisioning agent
-
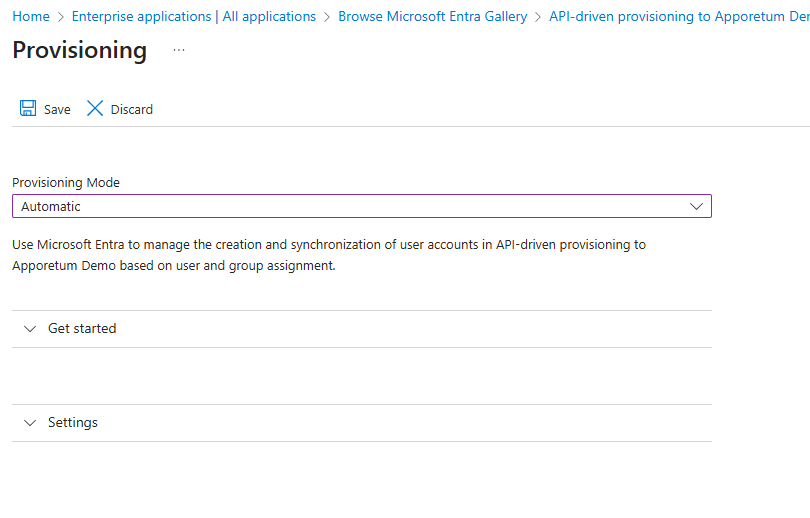
Change the Provisioning Mode to Automatic
-
Select Save
-
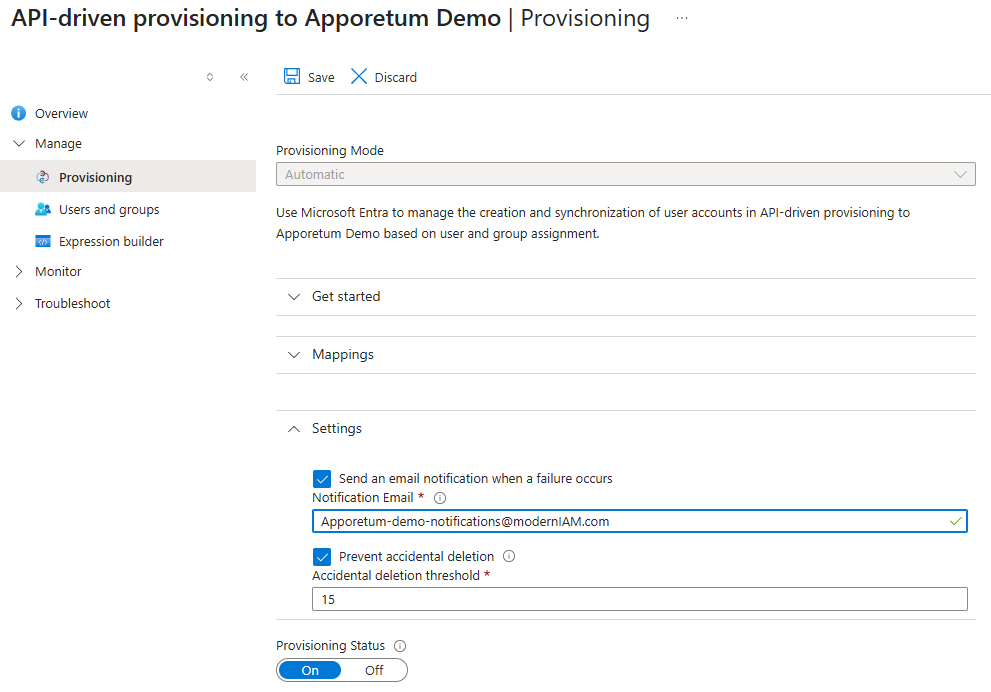
Expand the Settings tab
-
Enable Send an email notification when a failure occurs and set the value to an email that will receive notifications when failures occur
-
Enable Prevent accidental deletion and set the value to 15
This setting prevents users and groups from being accidentally disabled or deleted in your application
- Turn Provisioning Status to On
- Select Save
Configuring Provisioning Agent
- Navigate to the Enterprise App API Driven Provisioning Agent. Refer to Deploying Provisioning Agent
- Under the Manage blade, select Provisioning
- Select Start provisioning to turn on the provisioning agent

-
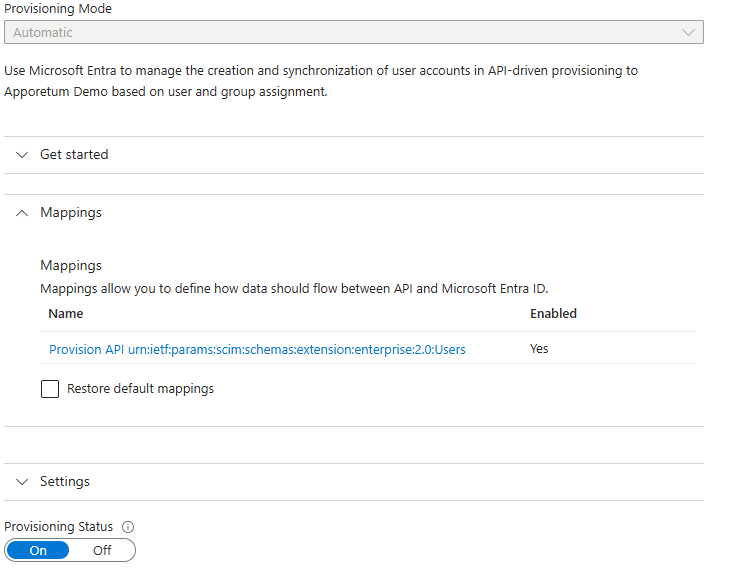
Select Edit attribute mappings

-
Expand the Edit attribute mappings tab
-
Select Provision API urn:ietf:params:scim:schemas:extension:enterprise:2.0:Users
-
Ensure Enabled is set to Yes
-
Enable Create under Target Object Actions.
Ensure Target Object Actions only has Create enabled. Disabling Update and Delete ensures existing users will not be altered or deleted during the set-up and testing of Apporetum Provisioning. It is recommended to only select Update or Delete once provisioning has been set up and testing has been done to confirm the service is working.
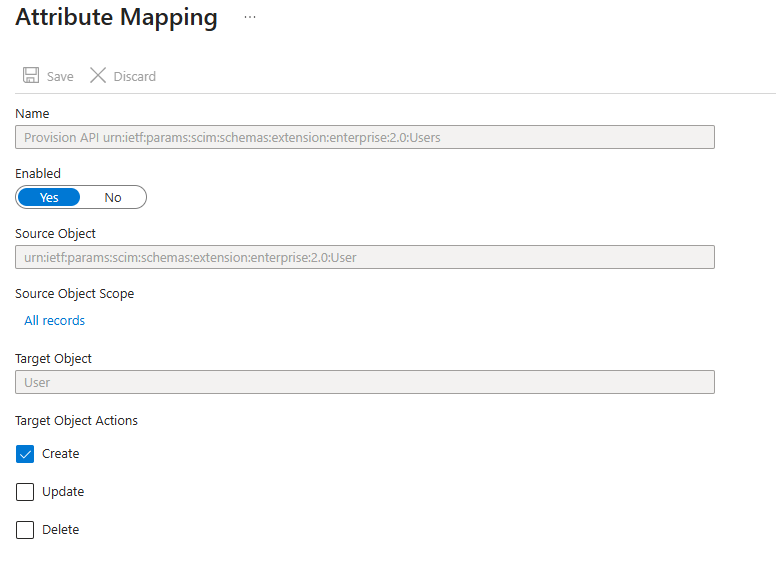
- Select Save
Attribute Mapping Overview
Attribute Mapping is a configuration feature that defines how user data flows between a source feed (CSV extract from HR System) and Entra ID. Attribute Mapping allows organisations to map specific attributes from your source feed to corresponding attributes in Entra ID. This mapping allows customisation into which properties get synchronised and how they get transformed to fit your organisation's specific needs. The table below describes an example Attribute Mapping an organisation might use.
| Microsoft Entra ID Attribute | API Attribute |
|---|---|
| street Address | addresses[type eq "work"].streetAddress |
| city | addresses[type eq "work"].locality |
| state | addresses[type eq "work"].region |
| postalCode | addresses[type eq "work"].postalCode |
| country | addresses[type eq "work"].country |
| department | urn:ietf:params:scim:schemas:extension:enterprise:2.0:User:department |
| employeeid | urn:ietf:params:scim:schemas:extension:apporetum:1.0:User:employeeId |
| extensionAttribute1 | urn:ietf:params:scim:schemas:extension:apporetum:1.0:User:extensionAttribute1 |
Configure Attribute Mappings
After the provisioning agent is deployed, further configuration to the attribute mappings is required. Attribute mappings define how attributes are synchronised between the API and Microsoft Entra ID.
- Navigate to Attribute Mapping for the provisioning agent. Refer to step 1-6 of Configuring Provisioning Agent
- Enable Show advanced options. This is located under the Attribute Mappings table.
- Select Edit attribute list for API

-
Manually add the following attributes in the table below into the attribute list. The values for Primary Key, Required, Multi-value, Exact case, API Expression, and Referenced Object Attribute are not required for the manual input.
infoAttribute Mappings are case sensitive. It is recommended to copy and paste the attributes to avoid errors.
Name Type urn:ietf:params:scim:schemas:extension:apporetum:1.0:User:accountExpireDate DateTime urn:ietf:params:scim:schemas:extension:apporetum:1.0:User:costCenter String urn:ietf:params:scim:schemas:extension:apporetum:1.0:User:city String urn:ietf:params:scim:schemas:extension:apporetum:1.0:User:cloudExtensionAttribute1 String urn:ietf:params:scim:schemas:extension:apporetum:1.0:User:cloudExtensionAttribute10 String urn:ietf:params:scim:schemas:extension:apporetum:1.0:User:cloudExtensionAttribute11 String urn:ietf:params:scim:schemas:extension:apporetum:1.0:User:cloudExtensionAttribute12 String urn:ietf:params:scim:schemas:extension:apporetum:1.0:User:cloudExtensionAttribute13 String urn:ietf:params:scim:schemas:extension:apporetum:1.0:User:cloudExtensionAttribute14 String urn:ietf:params:scim:schemas:extension:apporetum:1.0:User:cloudExtensionAttribute15 String urn:ietf:params:scim:schemas:extension:apporetum:1.0:User:cloudExtensionAttribute16 String urn:ietf:params:scim:schemas:extension:apporetum:1.0:User:cloudExtensionAttribute17 String urn:ietf:params:scim:schemas:extension:apporetum:1.0:User:cloudExtensionAttribute18 String urn:ietf:params:scim:schemas:extension:apporetum:1.0:User:cloudExtensionAttribute19 String urn:ietf:params:scim:schemas:extension:apporetum:1.0:User:cloudExtensionAttribute2 String urn:ietf:params:scim:schemas:extension:apporetum:1.0:User:cloudExtensionAttribute20 String urn:ietf:params:scim:schemas:extension:apporetum:1.0:User:cloudExtensionAttribute3 String urn:ietf:params:scim:schemas:extension:apporetum:1.0:User:cloudExtensionAttribute4 String urn:ietf:params:scim:schemas:extension:apporetum:1.0:User:cloudExtensionAttribute5 String urn:ietf:params:scim:schemas:extension:apporetum:1.0:User:cloudExtensionAttribute6 String urn:ietf:params:scim:schemas:extension:apporetum:1.0:User:cloudExtensionAttribute7 String urn:ietf:params:scim:schemas:extension:apporetum:1.0:User:cloudExtensionAttribute8 String urn:ietf:params:scim:schemas:extension:apporetum:1.0:User:cloudExtensionAttribute9 String urn:ietf:params:scim:schemas:extension:apporetum:1.0:User:company String urn:ietf:params:scim:schemas:extension:apporetum:1.0:User:country String urn:ietf:params:scim:schemas:extension:apporetum:1.0:User:countryCode String urn:ietf:params:scim:schemas:extension:apporetum:1.0:User:countryLetterCode String urn:ietf:params:scim:schemas:extension:apporetum:1.0:User:dateOfBirth DateTime urn:ietf:params:scim:schemas:extension:apporetum:1.0:User:description String urn:ietf:params:scim:schemas:extension:apporetum:1.0:User:employeeId String urn:ietf:params:scim:schemas:extension:apporetum:1.0:User:employeeLeaveDateTime DateTime urn:ietf:params:scim:schemas:extension:apporetum:1.0:User:employeeType String urn:ietf:params:scim:schemas:extension:apporetum:1.0:User:employeeNumber String urn:ietf:params:scim:schemas:extension:apporetum:1.0:User:endDate DateTime urn:ietf:params:scim:schemas:extension:apporetum:1.0:User:extensionAttribute1 String urn:ietf:params:scim:schemas:extension:apporetum:1.0:User:extensionAttribute10 String urn:ietf:params:scim:schemas:extension:apporetum:1.0:User:extensionAttribute11 String urn:ietf:params:scim:schemas:extension:apporetum:1.0:User:extensionAttribute12 String urn:ietf:params:scim:schemas:extension:apporetum:1.0:User:extensionAttribute13 String urn:ietf:params:scim:schemas:extension:apporetum:1.0:User:extensionAttribute14 String urn:ietf:params:scim:schemas:extension:apporetum:1.0:User:extensionAttribute15 String urn:ietf:params:scim:schemas:extension:apporetum:1.0:User:extensionAttribute2 String urn:ietf:params:scim:schemas:extension:apporetum:1.0:User:extensionAttribute3 String urn:ietf:params:scim:schemas:extension:apporetum:1.0:User:extensionAttribute4 String urn:ietf:params:scim:schemas:extension:apporetum:1.0:User:extensionAttribute5 String urn:ietf:params:scim:schemas:extension:apporetum:1.0:User:extensionAttribute6 String urn:ietf:params:scim:schemas:extension:apporetum:1.0:User:extensionAttribute7 String urn:ietf:params:scim:schemas:extension:apporetum:1.0:User:extensionAttribute8 String urn:ietf:params:scim:schemas:extension:apporetum:1.0:User:extensionAttribute9 String urn:ietf:params:scim:schemas:extension:apporetum:1.0:User:externalOrganisation String urn:ietf:params:scim:schemas:extension:apporetum:1.0:User:faxNumber String urn:ietf:params:scim:schemas:extension:apporetum:1.0:User:hireDate DateTime urn:ietf:params:scim:schemas:extension:apporetum:1.0:User:honorificPrefix String urn:ietf:params:scim:schemas:extension:apporetum:1.0:User:honorificSuffix String urn:ietf:params:scim:schemas:extension:apporetum:1.0:User:isSoftDelete String urn:ietf:params:scim:schemas:extension:apporetum:1.0:User:info String urn:ietf:params:scim:schemas:extension:apporetum:1.0:User:ipPhone String urn:ietf:params:scim:schemas:extension:apporetum:1.0:User:jobDescription String urn:ietf:params:scim:schemas:extension:apporetum:1.0:User:jobid String urn:ietf:params:scim:schemas:extension:apporetum:1.0:User:jobTitle String urn:ietf:params:scim:schemas:extension:apporetum:1.0:User:leaveEnd DateTime urn:ietf:params:scim:schemas:extension:apporetum:1.0:User:leaveStart DateTime urn:ietf:params:scim:schemas:extension:apporetum:1.0:User:leaveType String urn:ietf:params:scim:schemas:extension:apporetum:1.0:User:location String urn:ietf:params:scim:schemas:extension:apporetum:1.0:User:officeLocation String urn:ietf:params:scim:schemas:extension:apporetum:1.0:User:onPremisesDistinguishedName String urn:ietf:params:scim:schemas:extension:apporetum:1.0:User:onPremisesImmutableId String urn:ietf:params:scim:schemas:extension:apporetum:1.0:User:onPremisesSamAccountName String urn:ietf:params:scim:schemas:extension:apporetum:1.0:User:onPremisesSecurityId String urn:ietf:params:scim:schemas:extension:apporetum:1.0:User:orgUnitId String urn:ietf:params:scim:schemas:extension:apporetum:1.0:User:phoneExtension String urn:ietf:params:scim:schemas:extension:apporetum:1.0:User:postalCode String urn:ietf:params:scim:schemas:extension:apporetum:1.0:User:proxyAddresses String urn:ietf:params:scim:schemas:extension:apporetum:1.0:User:securityClearanceExpiry DateTime urn:ietf:params:scim:schemas:extension:apporetum:1.0:User:securityClearanceId String urn:ietf:params:scim:schemas:extension:apporetum:1.0:User:securityClearanceLevel String urn:ietf:params:scim:schemas:extension:apporetum:1.0:User:startDate DateTime urn:ietf:params:scim:schemas:extension:apporetum:1.0:User:state String urn:ietf:params:scim:schemas:extension:apporetum:1.0:User:streetAddress String -
Save the table
Scoping Filters
If your organisation requires granular rules to determine which users or groups are provisioned, you can set up scoping filters to define a set of attributes to be targeted. More information on scoping filters can be found here.
Assigning Permissions
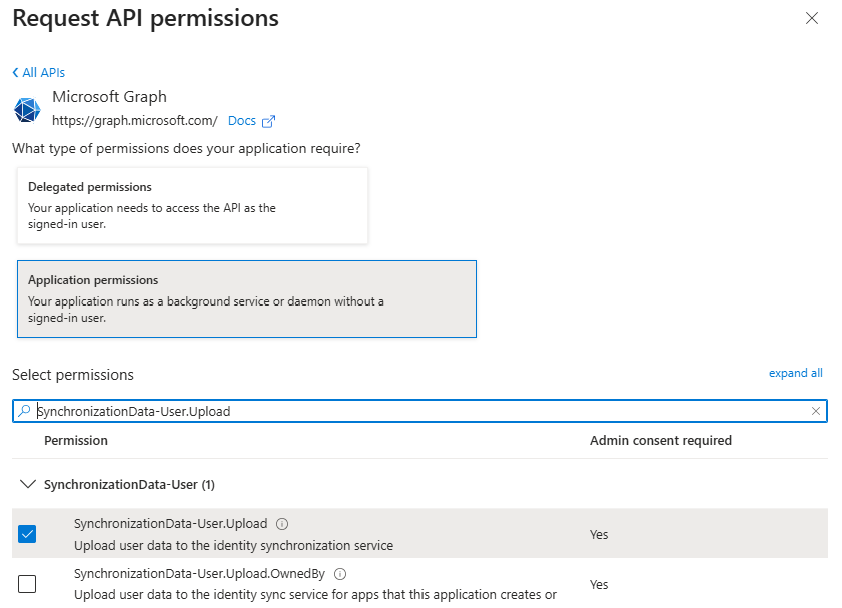
Apporetum requires a specific API Permission in order to provision users using the API-driven provisioning agent. The API permission SynchronizationData-User.Upload allows the application to upload bulk user data to the identity synchronisation service, without a signed-in user.
-
Navigate to App Registrations
-
Select the Apporetum app registration
-
Select API Permissions under the Manage blade
-
Select + Add a permission
-
Select Microsoft Graph
-
Select Application permissions
-
Search and select SynchronizationData-User.Upload
-
Select Add permissions to add the permission to the app registration
Creating a Secret
This step is only required if the provisioning agent and the Entra ID tenant where users will be provisioned are in different tenancies. If they are in the same tenancy, you can skip this section.
-
Navigate to App Registration in the Azure Portal
-
Select the API-driven provisioning application that was created. Refer to Deploying Provisioning Agent to create a provisioning agent
-
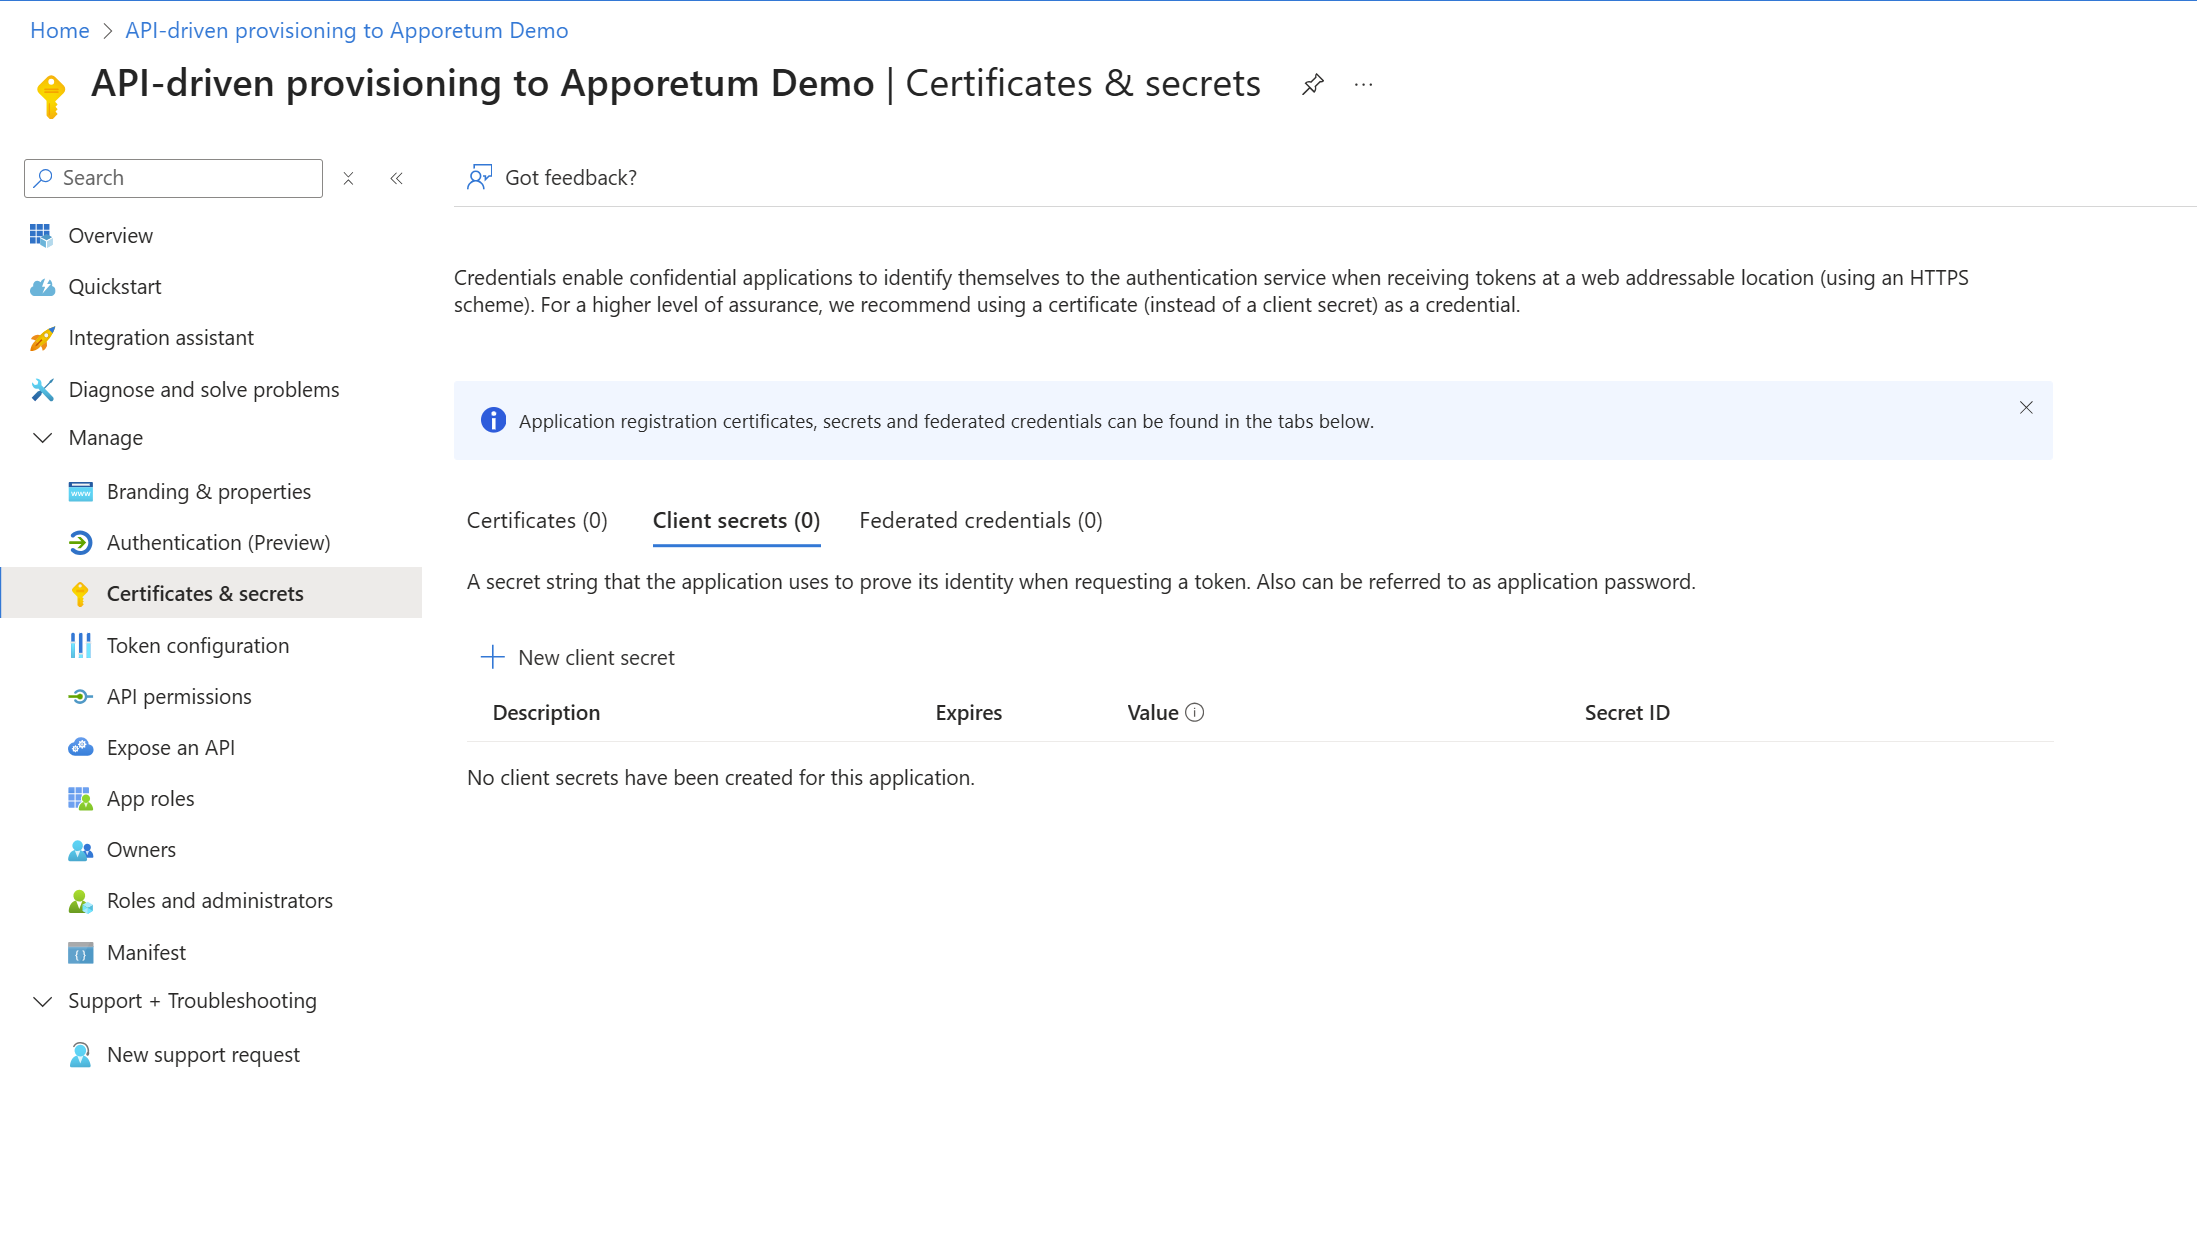
Select Certificates & Secrets under the Manage blade
-
Select + New Client Secret to generate a new client secret. Give this secret a description and select the expiry time frame for the secret.
-
Select Add to create the new client secret
-
Note down the client secret value as this value cannot be viewed, except for immediately after creation.
Configure CSV for Apporetum
Generate a CSV file from your ITSM or HR tool that contains user identities. This file can be imported into Apporetum which can then handle further insights and automate identity lifecycle management across your organisation. This section of the provisioning set up requires you to have either System Admin, Global Admin, or Lifecycle Admin role assigned.
Data Sources
Apporetum supports CSV imports from various systems, including:
- HR Systems - Employee records, organisational data, job titles, departments
- Identity Providers - Existing user directories
Workforce Feeds
Workforce Feeds are CSV data files from your organisation's HR system that can be ingested into Apporetum. Workforce feeds require configuration in order for Apporetum to provide automatic provisioning.
Further information regarding data sources can be found here.
-
Navigate to Apporetum
-
Navigate to Settings -> Connectivity -> Workforce Feeds
-
Select Configure feed
-
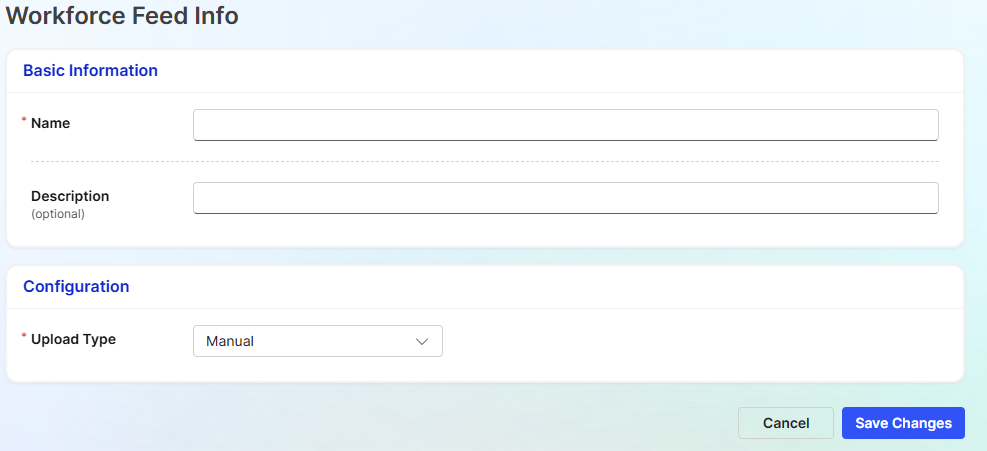
Fill out the basic information and configuration type:
- Name - Unique name for the workforce feed
- Description (optional) - A description to describe the workforce feed. (What data is it? Which HR system?)
- Upload Type - Manual
-
Select Save Changes
-
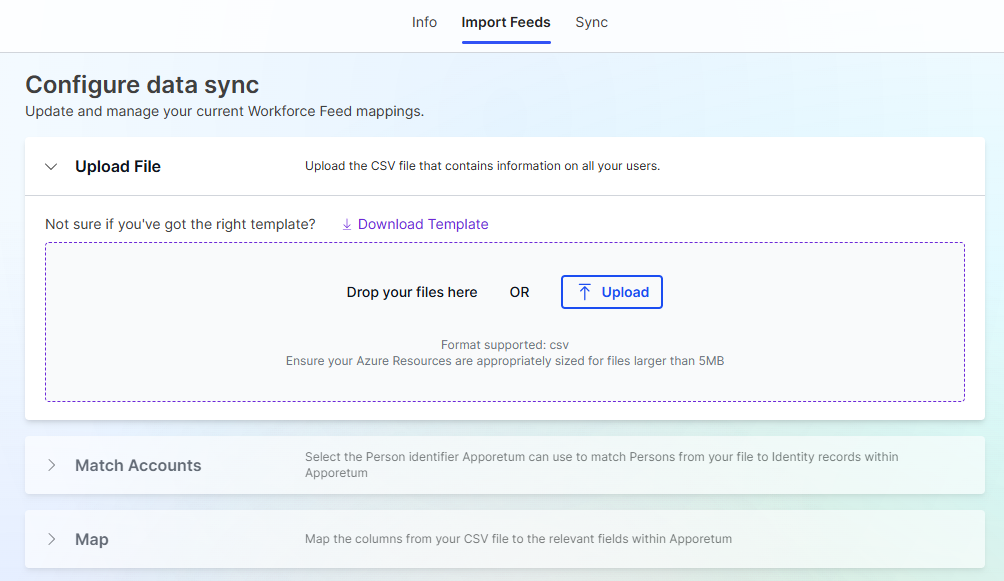
Upload a CSV file by clicking on the upload box or dragging your CSV file into the upload area
-
After a CSV file has been uploaded you will need to match an account identifier. Expand the Match Accounts tab and select a value that represents a person's identifier. This allows Apporetum to match identities from the CSV file to identity records within Apporetum.
In most cases, the identifier used to match is Employee ID. If this is not the case for your organisation, select the identifier from the drop down boxes provided.
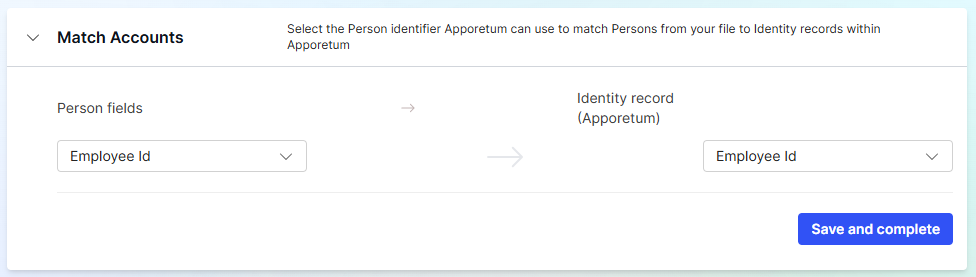
- Select Save and complete
- Open the Map tab. These settings allow you to map the columns from your CSV file to the relevant fields within Apporetum. These mappings may be different based on your organisation's requirements. The screenshot below depicts an example CSV mapping.
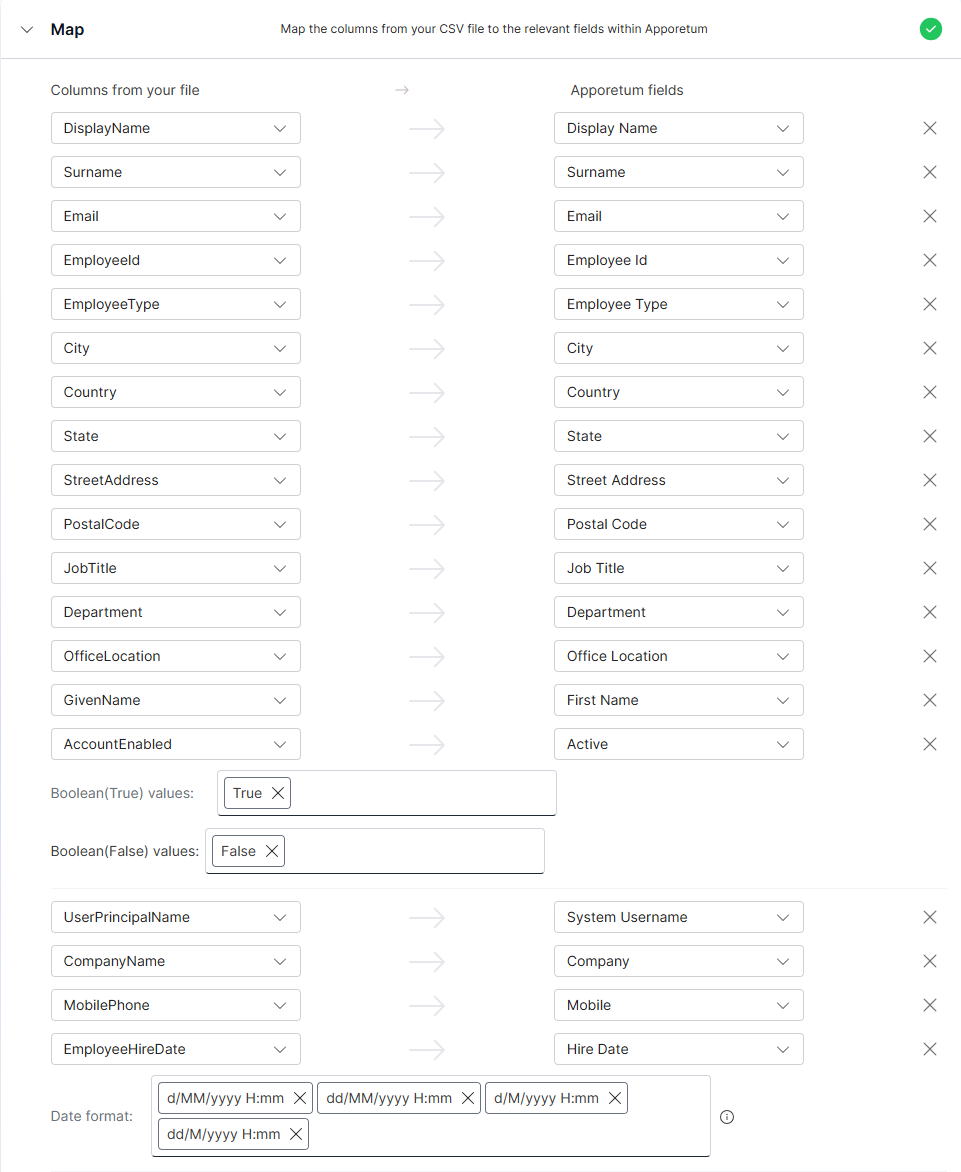
- Select Save and complete
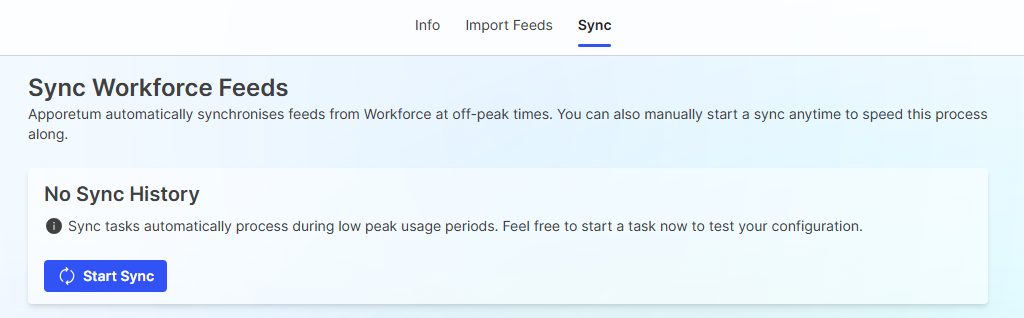
- Navigate to the Sync tab
- Select Start Sync
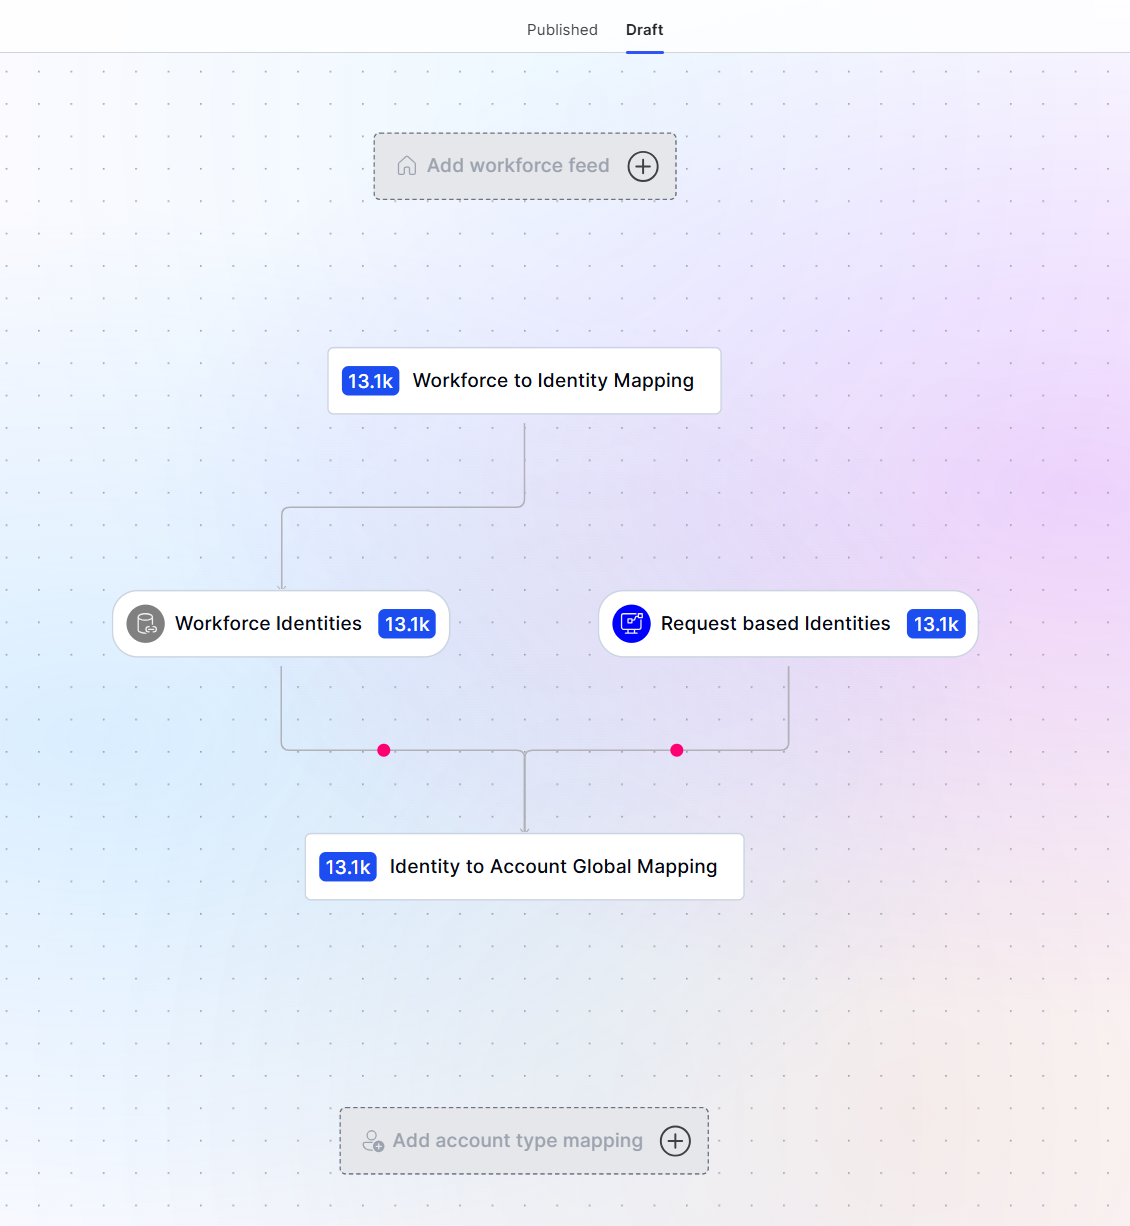
Configure Provisioning Flow
A Provisioning Flow is part of Apporetum's Life Cycle Management toolkit that allows users to configure how Apporetum treats specific workforce feeds. The Provisioning Flow maps out the lifecycle starting from the workforce feed all the way to an account mapping in Apporetum.
Further information regarding account types can be found here.
Add Workforce Feed
- Navigate to Apporetum
- Select Identity -> Life Cycle Management -> Provisioning Flow
- Switch the view to Draft
- Select Add Workforce Feed
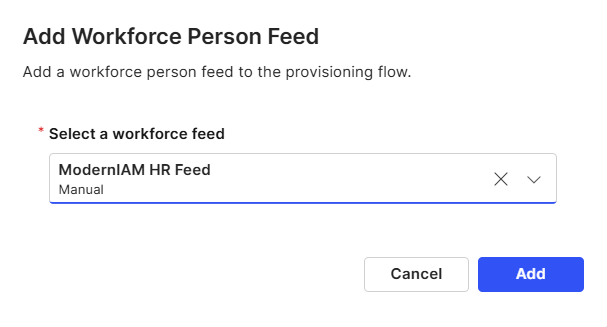
-
Select the workforce feed that has been configured in the previous steps. Refer to Workforce Feeds
-
Select Add
Workforce to Identity Mapping
-
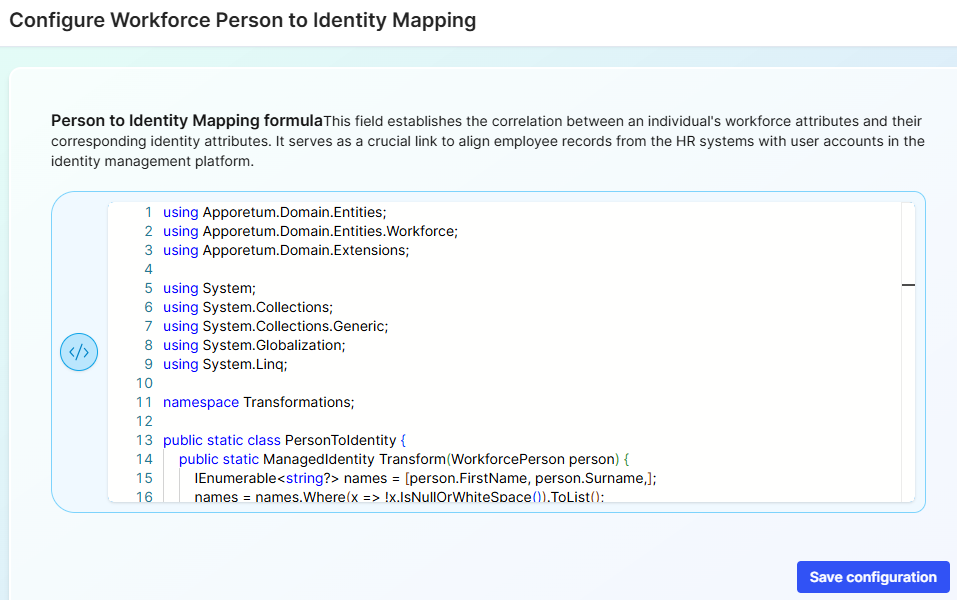
Select Workforce to Identity Mapping

-
In the Person to Identity Mapping formula copy and paste the following code block:
using Apporetum.Domain.Entities;
using Apporetum.Domain.Entities.Workforce;
using Apporetum.Domain.Extensions;

using System;
using System.Collections;
using System.Collections.Generic;
using System.Globalization;
using System.Linq;

namespace Transformations;

public static class PersonToIdentity {
    public static ManagedIdentity Transform(WorkforcePerson person) {
        IEnumerable<string?> names = [person.FirstName, person.Surname,];
        names = names.Where(x => !x.IsNullOrWhiteSpace()).ToList();

        IEnumerable<string?> preferredNames = [person.PreferredName ?? person.FirstName, person.Surname,];
        preferredNames = preferredNames.Where(x => !x.IsNullOrWhiteSpace()).ToList();

        return new ManagedIdentity() {
            AccountEnabled = person.Active ?? true,
            EmployeeNumber = person.EmployeeNumber,
            UserPrincipalName = person.SystemUsername,
            Email = person.Email,
            DisplayName = string.Join(" ", preferredNames),
            FirstName = person.FirstName,
            MiddleName = person.MiddleName,
            Surname = person.Surname,
            PreferredName = person.PreferredName,
            HonorificPrefix = person.HonorificPrefix,
            HonorificSuffix = person.HonorificSuffix,
            Mobile = person.Phone,
            TelephoneNumber = person.Mobile,
            PhoneExtension = person.PhoneExtension,
            StreetAddress = person.StreetAddress,
            City = person.City,
            State = person.State,
            Country = person.Country,
            PostalCode = person.PostalCode,
            HireDate = person.HireDate,
            StartDate = person.StartDate,
            EndDate = person.EndDate,
            Organisation = person.Organisation,
            Company = person.Company,
            Division = person.Division,
            Department = person.OrgUnitId,
            EmployeeId = person.EmployeeId,
            EmployeeType = person.EmployeeType,
            JobTitle = person.JobTitle,
            ManagerId = person.ManagerId,
            CostCenter = person.CostCentreId,
            JobId = person.JobId,
            JobDescription = person.JobDescription,
            OfficeLocation = person.OfficeLocation,
            SecurityClearanceId = person.SecurityClearanceId,
            SecurityClearanceLevel = person.SecurityClearanceLevel,
            SecurityClearanceExpiry = person.SecurityClearanceExpiry,
            CustomAttribute1 = person.CustomAttribute1,
            CustomAttribute2 = person.CustomAttribute2,
            CustomAttribute3 = person.CustomAttribute3,
            CustomAttribute4 = person.CustomAttribute4,
            CustomAttribute5 = person.CustomAttribute5,
            CustomAttribute6 = person.CustomAttribute6,
            CustomAttribute7 = person.CustomAttribute7,
            CustomAttribute8 = person.CustomAttribute8,
            CustomAttribute9 = person.CustomAttribute9,
            CustomAttribute10 = person.CustomAttribute10,
            CustomAttribute11 = person.CustomAttribute11,
            CustomAttribute12 = person.CustomAttribute12,
            CustomAttribute13 = person.CustomAttribute13,
            CustomAttribute14 = person.CustomAttribute14,
            CustomAttribute15 = person.CustomAttribute15,
        };
    }
}
- Select Save configuration
Identity to Account Mapping
-
Navigate and select Identity to Account Global Mapping

-
In the Identity to Account Mapping formula copy and paste the following code block:
using Apporetum.Domain.Entities;
using Apporetum.Domain.Entities.Workforce;
using Apporetum.Domain.Extensions;

using System;
using System.Collections;
using System.Collections.Generic;
using System.Linq;

namespace Transformations;

public static class IdentityToAccount {
    public static ManagedAccount Transform(ManagedIdentity identity) {
        return new ManagedAccount() {

            DisplayName = identity.DisplayName,
            FirstName = identity.FirstName,
            Surname = identity.Surname,
            MiddleName = identity.MiddleName,
            PreferredName = identity.PreferredName,
            UserPrincipalName = identity.UserPrincipalName,
            Description = identity.Description,
            Info = identity.Info,
            Email = identity.Email,
            MailNickname = identity.MailNickname,
            Mobile = identity.Mobile,
            TelephoneNumber = identity.TelephoneNumber,
            HomePhone = identity.HomePhone,
            IpPhone = identity.IpPhone,
            FaxNumber = identity.FaxNumber,
            Country = identity.Country,
            CountryCode = identity.CountryCode,
            CountryLetterCode = identity.CountryLetterCode,
            City = identity.City,
            StreetAddress = identity.StreetAddress,
            Location = identity.Location,
            PostalCode = identity.PostalCode,
            State = identity.State,
            Company = identity.Company,
            EmployeeId = identity.EmployeeId,
            EmployeeType = identity.EmployeeType,
            EmployeeNumber = identity.EmployeeNumber,
            JobTitle = identity.JobTitle,
            Division = identity.Division,
            Department = identity.Department,
            ManagerId = identity.ManagerId,
            ManagerDisplayName = identity.ManagerDisplayName,
            OrgUnitId = identity.OrgUnitId,
            Organisation = identity.Organisation,
            CostCenter = identity.CostCenter,
            ConsistencyGuid = identity.ConsistencyGuid,
            OnPremisesDistinguishedName = identity.OnPremisesDistinguishedName,
            OnPremisesImmutableId = identity.OnPremisesImmutableId,
            OnPremisesSamAccountName = identity.OnPremisesSamAccountName,
            OnPremisesSecurityId = identity.OnPremisesSecurityId,
            AccountExpireDate = identity.AccountExpireDate,
            JobId = identity.JobId,
            JobDescription = identity.JobDescription,
            OfficeLocation = identity.OfficeLocation,
            SecurityClearanceId = identity.SecurityClearanceId,
            SecurityClearanceLevel = identity.SecurityClearanceLevel,
            SecurityClearanceExpiry = identity.SecurityClearanceExpiry,
            HireDate = identity.HireDate,
            StartDate = identity.StartDate,
            ExtensionAttribute1 = identity.CustomAttribute1,
            ExtensionAttribute2 = identity.CustomAttribute2,
            ExtensionAttribute3 = identity.CustomAttribute3,
            ExtensionAttribute4 = identity.CustomAttribute4,
            ExtensionAttribute5 = identity.CustomAttribute5,
            ExtensionAttribute6 = identity.CustomAttribute6,
            ExtensionAttribute7 = identity.CustomAttribute7,
            ExtensionAttribute8 = identity.CustomAttribute8,
            ExtensionAttribute9 = identity.CustomAttribute9,
            ExtensionAttribute10 = identity.CustomAttribute10,
            ExtensionAttribute11 = identity.CustomAttribute11,
            ExtensionAttribute12 = identity.CustomAttribute12,
            ExtensionAttribute13 = identity.CustomAttribute13,
            ExtensionAttribute14 = identity.CustomAttribute14,
            ExtensionAttribute15 = identity.CustomAttribute15,
        };
    }
}
- Select Save configuration
Account Type Mapping
-
Select Add account type mapping

-
Use the dropdown box to select an account type
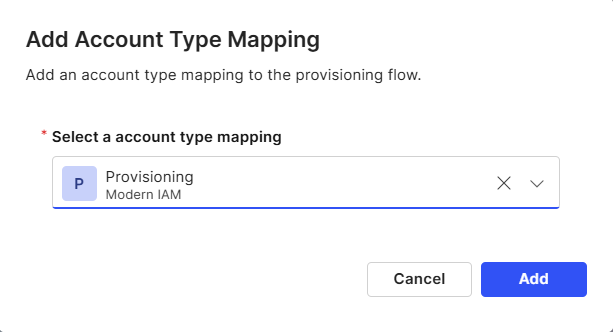
-
Select Add
-
Navigate to the newly created account type mapping in the Provisioning Flow
-
Under the Schedule tab, select the Account Type to Identity Mapping formula that best suits your organisation's needs.
This setting describes how the Account Type will sync with your identity.
- Off = No sync will occur
- Always on = Always syncs where there are changes
- External = Trigger sync on external request
- Filtered = Sync users based on specific criteria

- Select Save configuration
Configure Connected Data Source
-
Select the Connected Data Source in the Provisioning Flow. This is usually the name of your Entra ID Tenant where user provisioning will occur. In this example, the Connected Data Source is named "Modern IAM"

-
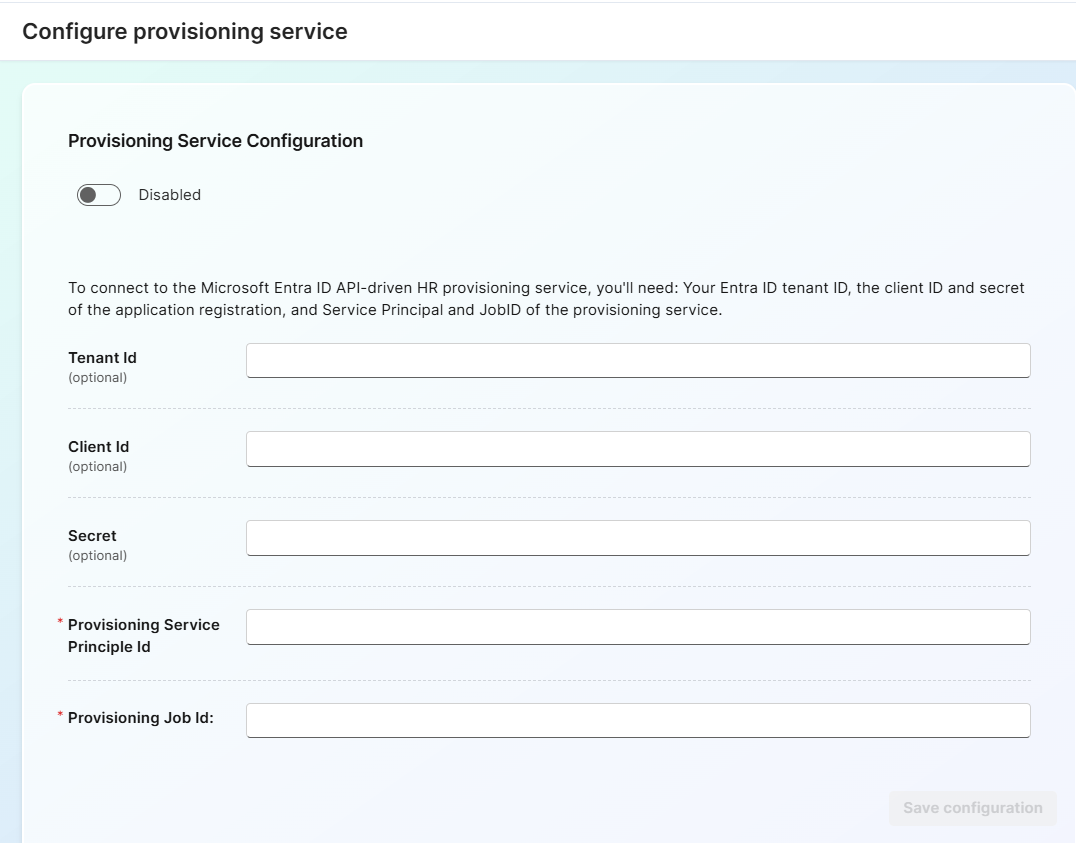
This is where you will configure the Provisioning Agent to connect to Apporetum. Fill out the configuration as follows:
- Provisioning Service Configuration - Enabled (This enables the provisioning flow to connect to the Provisioning Agent)
- Tenant ID (optional) - Required when user provisioning is occurring in a separate tenant
- Client ID (optional) - Required when user provisioning is occurring in a separate tenant
- Secret (optional) - Required when user provisioning is occurring in a separate tenant
- Provisioning Service Principal ID - The Application ID of the Provisioning Agent
- Provisioning Job ID - The Job ID of the Provisioning Agent
Information on how to find the Provisioning Service Principal ID and Provisioning Job ID can be found here.
-
Select Save configuration
-
Select Publish

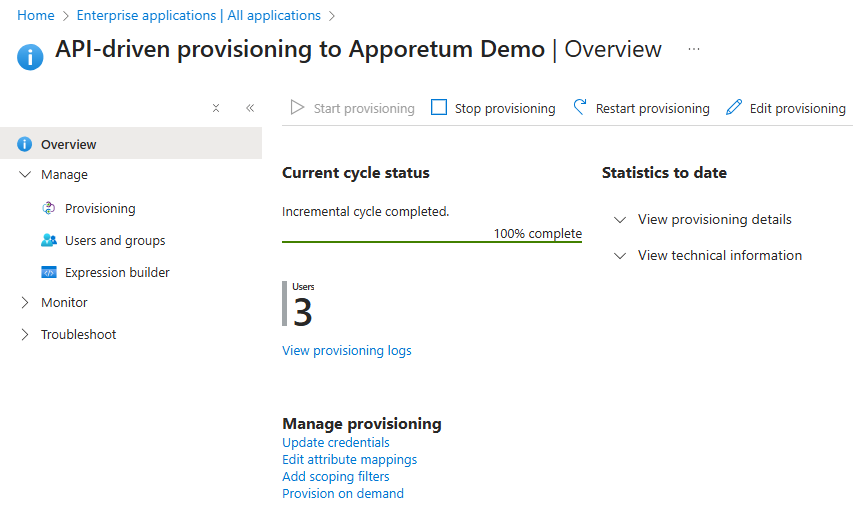
Finding the Provisioning Service Principal ID and Provisioning Job ID
The Apporetum Provisioning Flow requires the provisioning Service Principal ID and Provisioning Job ID from the deployed Provisioning Agent. To find this information:
- In the Azure portal navigate to Enterprise Apps
- Select the API-driven Provisioning app
- Under Properties copy the Object ID - This is the "Provisioning Service Principal ID"
- Under the Manage blade, select Provisioning
- Expand the View technical information tab
- Copy the Job ID - This is the "Provisioning Job ID"
Testing Apporetum Provisioning
In order to test if the Provisioning Flow is working as intended you can follow these steps:
-
Create a new CSV file to import into Apporetum as a workforce feed
-
Ensure there is data of at least one new user who does not exist in Entra ID Tenant
-
Navigate to Apporetum
-
Select Settings -> Connectivity -> Workforce Feeds
-
Select the workforce feed that will be updated with the new CSV
-
Navigate to the Import Feeds tab
-
Upload the new CSV file
-
Navigate to the Sync tab
-
Select Start Sync to trigger a new sync
-
In the Azure Portal search for Enterprise Apps
-
Select the provisioning agent that was deployed
-
Select Provisioning under the Manage blade
-
Select View provisioning logs
-
The provisioning logs will show the status of current provisioning jobs. This may take a few minutes to populate. This can be used to confirm if the user was provisioned.
You can search Entra ID for the newly provisioned user to confirm if provisioning is working.
Further issues and troubleshooting for API-driven provisioning can be found here.
Apporetum SCIM Mapping
The following table defines the mapping between standard SCIM attributes and their corresponding properties in Apporetum.
| SCIM Key | Apporetum Managed Account Property |
|---|---|
| ExternalId | DSResourceId |
| DisplayName | DisplayName |
| Active | AccountEnabled |
| UserName | UserPrincipalName |
| NickName | PreferredName |
| GivenName | FirstName |
| FamilyName | Surname |
| MiddleName | MiddleName |
| HonorificPrefix | HonorificPrefix |
| HonorificSuffix | HonorificSuffix |
| Title | JobTitle |
| UserType | EmployeeType |
| Mobile | Phone |
| TelephoneNumber | Mobile |
| PhoneExtension | PhoneExtension |
| StreetAddress | StreetAddress |
| City | City |
| State | State |
| Country | Country |
| PostalCode | PostalCode |
| HireDate | HireDate |
| StartDate | StartDate |
| EndDate | EndDate |
| Organisation | Company |
| Division | Division |
| Department | OrgUnitId |
| ManagerId | ManagerId |
| CostCenter | CostCentreId |
| JobDescription | JobDescription |
| OfficeLocation | OfficeLocation |
| SecurityClearanceId | SecurityClearanceId |
| SecurityClearanceLevel | SecurityClearanceLevel |
| SecurityClearanceExpiry | SecurityClearanceExpiry |
| CustomAttribute1 | CustomAttribute1 |
| CustomAttribute2 | CustomAttribute2 |
| CustomAttribute3 | CustomAttribute3 |
| CustomAttribute4 | CustomAttribute4 |
| CustomAttribute5 | CustomAttribute5 |
| CustomAttribute6 | CustomAttribute6 |
| CustomAttribute7 | CustomAttribute7 |
| CustomAttribute8 | CustomAttribute8 |
| CustomAttribute9 | CustomAttribute9 |
| CustomAttribute10 | CustomAttribute10 |
| CustomAttribute11 | CustomAttribute11 |
| CustomAttribute12 | CustomAttribute12 |
| CustomAttribute13 | CustomAttribute13 |
| CustomAttribute14 | CustomAttribute14 |
| CustomAttribute15 | CustomAttribute15 |