Configuring the State Model
In this article, you can find information on how to create and configure a state model in Apporetum. This includes creating a draft, adding states, configuring transitions, and publishing the model.
We recommend running a simulation before publishing your state model. See Simulating the State Model for guidance.
The State Model landing page
To access the state model, select Identity in the navigation menu, then select State Model under the Life Cycle Management section.
The page is organised into three panels at the top and a Model Versions section below.
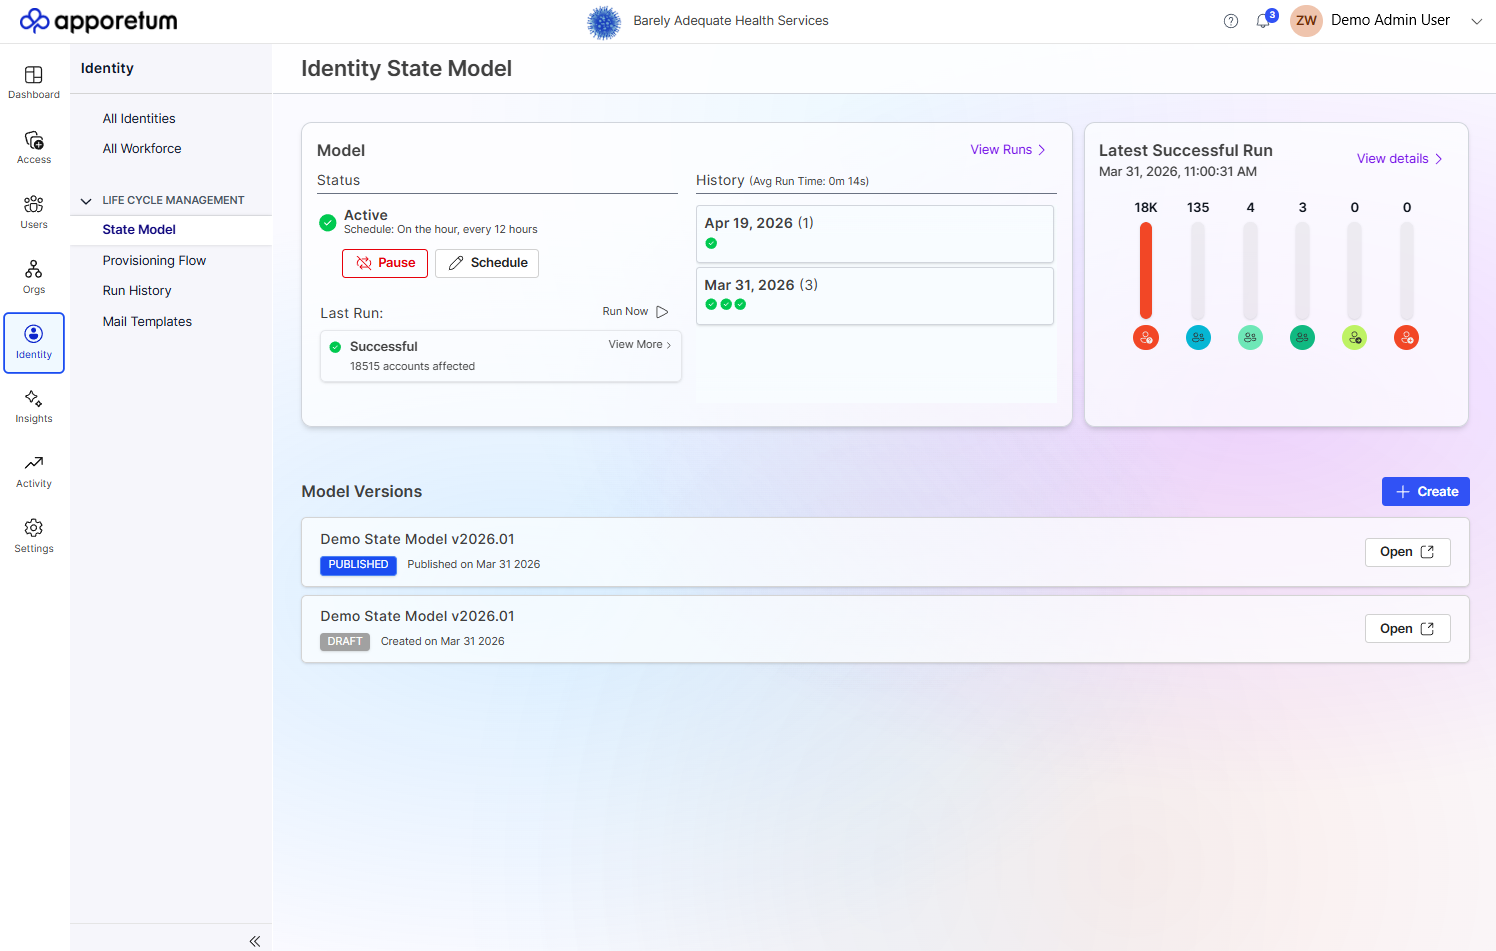 The Identity State Model landing page. The Model Versions section (bottom) shows published and draft models. The Model Run panel (top left) controls automated scheduling. The Latest Successful Run panel (top right) shows the number of users in each state.
Model Run panel
The Model Run panel shows the current run status and schedule for the published state model.
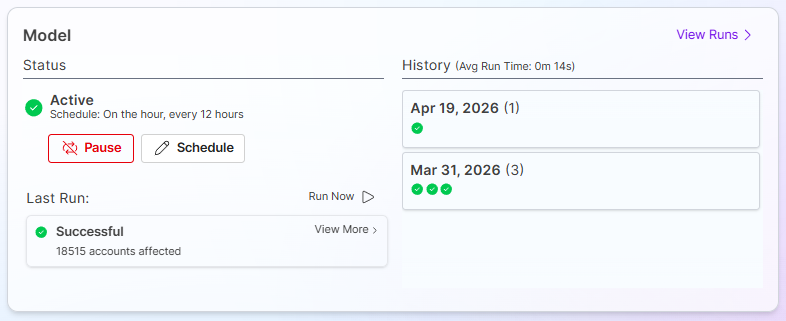 The Identity State Model run panel.
| Field | Description |
|---|---|
| Status | Shows whether the model run is Active or Inactive. |
| Schedule | The configured frequency - for example, "On the hour, every 2 hours". |
| Enable / Pause | Toggle the run status between Active and Inactive. |
| Run Now | Trigger a manual execution of the published state model immediately. |
| Last Run | Shows the last time the account lifecycle model was run. |
| History | Shows the status of each run of the state model over multiple days. |
History panel
Displays run timing statistics including average run time. Initially shows a prompt to run the model when no history exists.
Latest Successful Run panel
Displays the date, time, and per-state account counts from the most recent successful execution. Once runs exist, green and red arrow indicators show movement between runs.
State Model Versions
The Model Versions section lists all available state models. Apporetum maintains two versions at any time.
| Version | Description |
|---|---|
| Published | The active model currently governing your identity landscape. Select Open to view, then use Track to follow account progression, Results to inspect state detail, and Simulate to test against live data. |
| Draft | A working copy editable without affecting production. Select Open to continue editing. |
 The State Model Version panel.
Select + Create on the right-hand side of the Model Versions section to begin a new draft.
You can only have one draft at a time. Creating a new draft removes the previous draft. The new draft uses the current published model as its starting template.
Creating a Draft State Model
If you do not yet have a draft, follow these steps to create one.
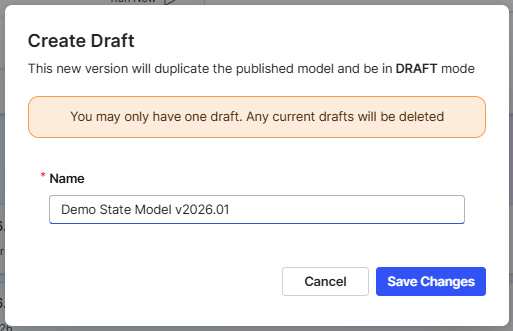 Create a draft state model.
- In the Apporetum navigation menu, select Identity, then select State Model.
- Select Create on the right-hand side of Model Versions.
- Enter a name for the draft and select Save Changes.
The State Model Canvas
When you open a draft state model, Apporetum loads the state model designer - a visual canvas where you build and manage your lifecycle flows.
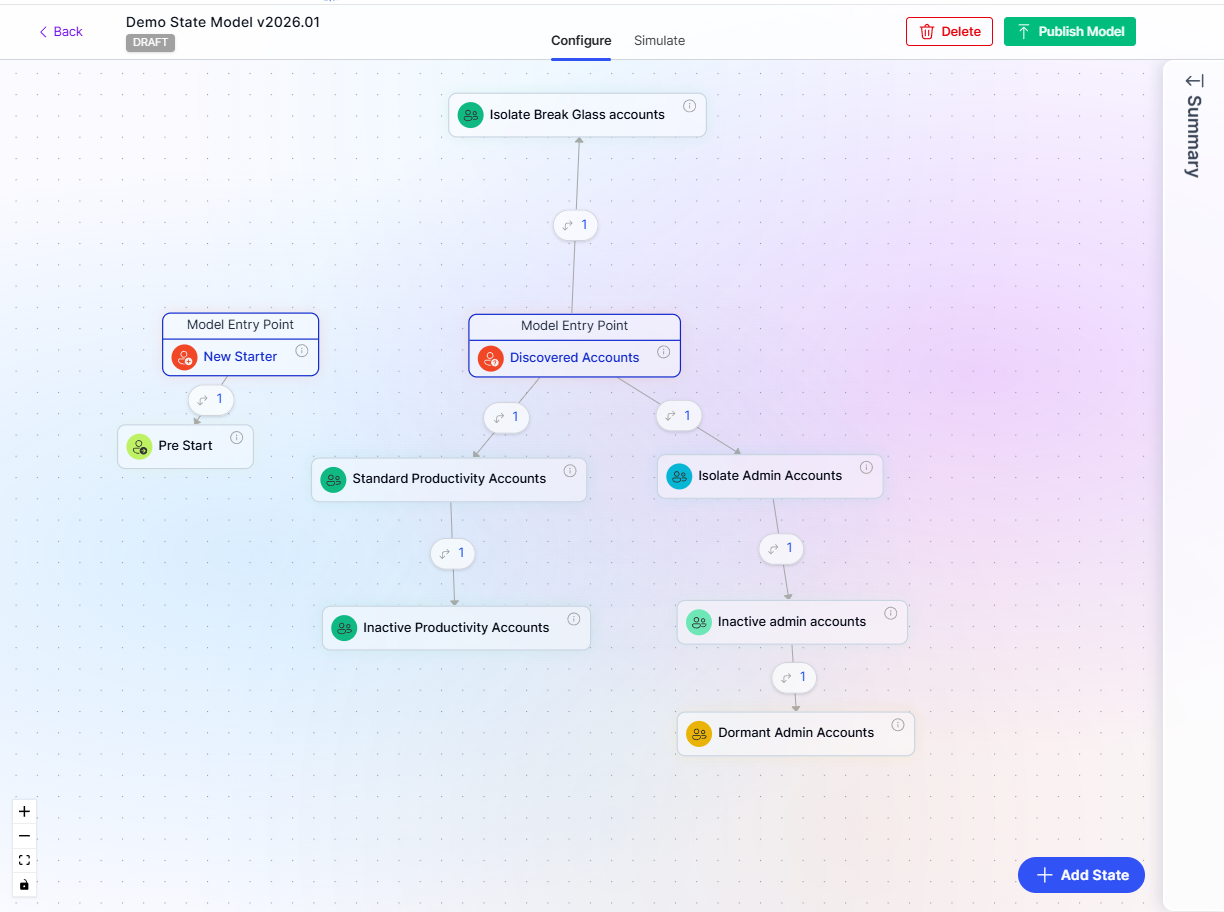 The state model designer canvas in DRAFT mode. The header shows the model name and DRAFT badge, along with Configure and Simulate tabs. Each flow begins from a Model Entry Point node.
The canvas header contains:
| Element | Description |
|---|---|
| Model name + DRAFT badge | Confirms you are editing a draft, not the published model. |
| Configure tab | The editing view (default). |
| Simulate tab | Run a simulation directly from the canvas without leaving the designer. |
| Delete | Remove the draft entirely. |
| Publish Model | Publish the draft as the new active model. |
| Summary panel | A collapsible right-side panel summarising states and transitions. |
Canvas controls at the bottom left allow you to zoom in, zoom out, and reset the view. The + Add State button sits at the bottom right.
Model Entry Points
Apporetum provides two built-in entry points that appear on the canvas and cannot be removed.
| Entry Point | Description |
|---|---|
| New Starter | Processes accounts that are newly added to your identity data source. |
| Discovered Accounts | Processes accounts found during a sync that already exist in your directory. |
Entry points are visually distinguished from regular states by an outer rounded border and a different icon. Accounts cannot be manually moved into entry point states.
Example canvas layout. The badge on each transition arrow shows the number of transitions configured between those states.
Adding States
In your draft state model, select + Add State in the bottom right corner of the canvas.
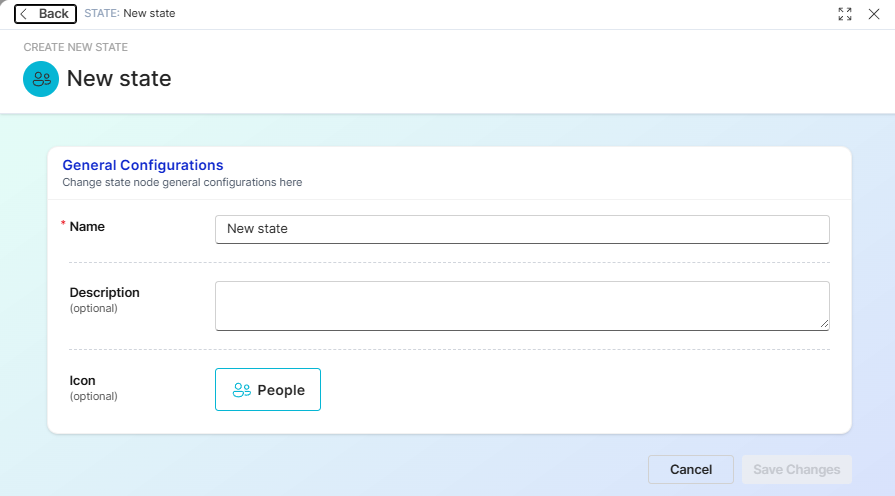 The Create New State form. Name is required. Description and Icon are optional. The Icon field opens a picker with both colour and icon options.
Complete the General Configurations section:
| Field | Required | Description |
|---|---|---|
| Name | Yes | The display name for the state, shown on the canvas and in reports. |
| Description | No | A brief explanation of what this state represents. |
| Icon | No | A colour and icon combination from the built-in picker, used to visually identify the state on the canvas. |
Select Save Changes. New states appear at the bottom of the state order after they are saved.
Choose icon colours that intuitively reflect the nature of each state - for example, green for active, yellow for on leave, and red for termination. Consistent colour coding makes the canvas easier to read at a glance.
Viewing State Details
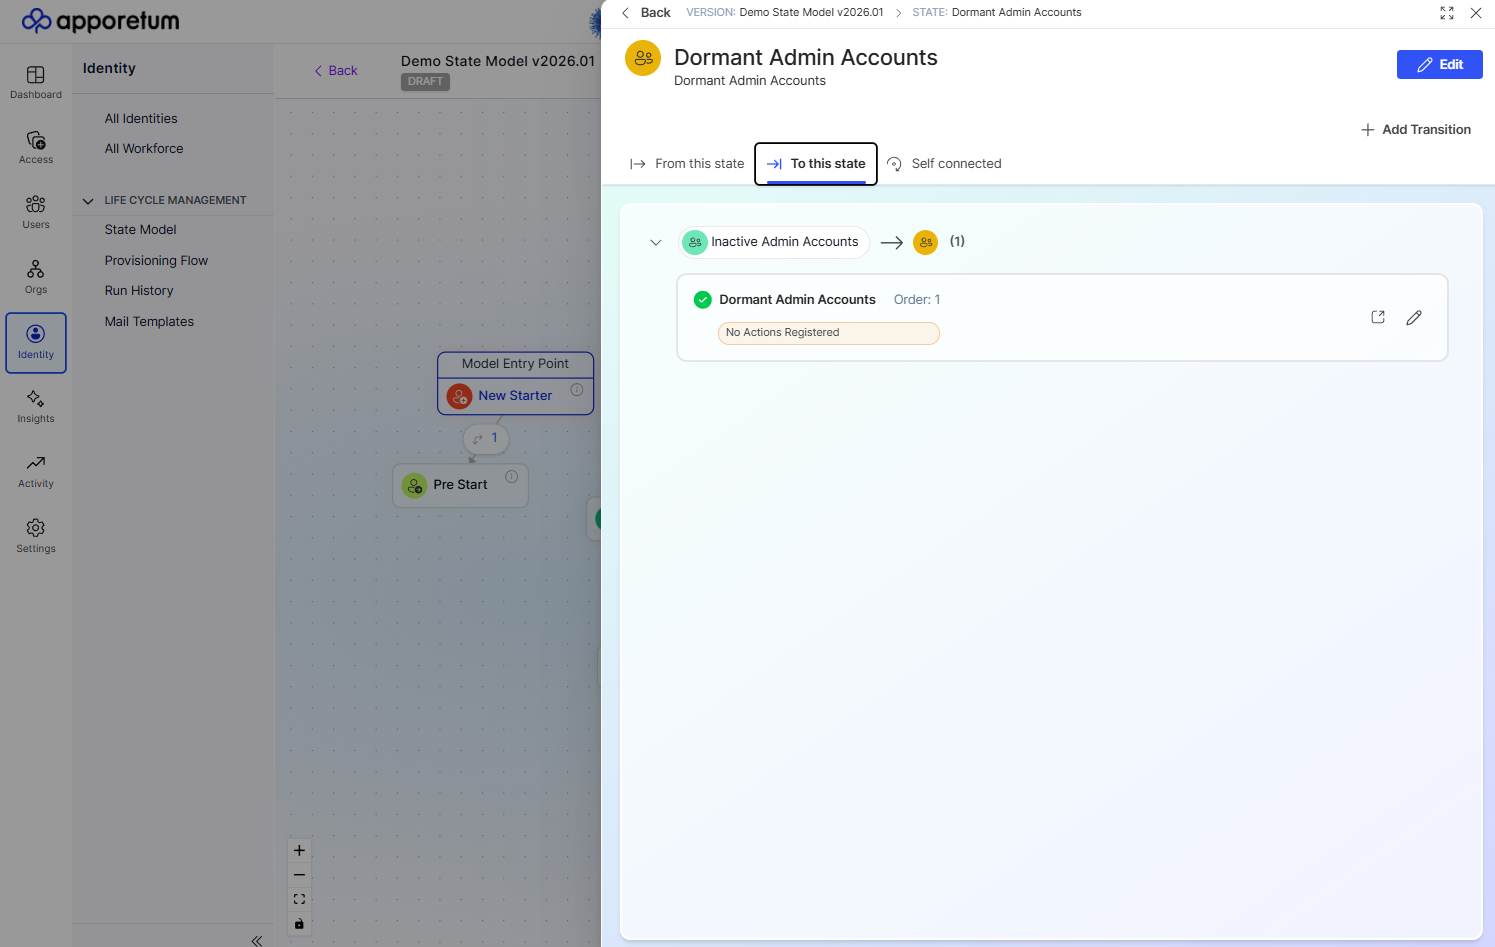
When you select a state on the canvas, Apporetum displays its detail panel. The panel is organised into three sections.
| Section | Description |
|---|---|
| From this state | All transitions that move accounts from this state to another. |
| To this state | All transitions that move accounts into this state from elsewhere. |
| Self connected | Transitions that return an account to the same state (used for re-evaluation without changing state). |
The Create New State form. Name is required. Description and Icon are optional. The Icon field opens a picker with both colour and icon options.
You can also Add transition and Reorder transitions directly from the state detail panel.
Adding a Transition
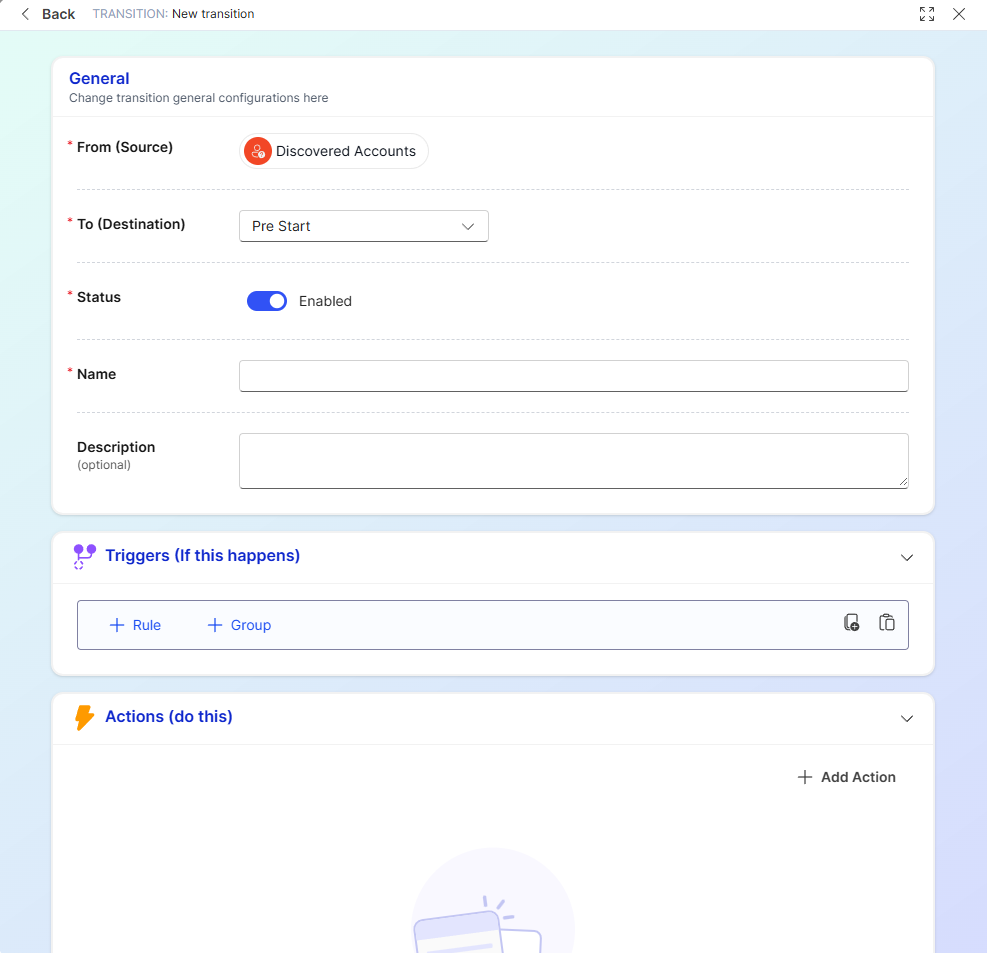
A transition defines the pathway between two states and contains the trigger conditions and actions that govern when and how an account moves.
- Select a state on the canvas, then select Add Transition.
- Complete the General tab:
- Select the destination state from the To (Destination) dropdown.
- Apporetum sets the transition status to Disabled by default. Select the toggle to enable it.
- Enter a Name for the transition. A description is optional.
- Configure the Triggers tab to define the conditions that activate this transition. See Configuring Transition Rules.
- Configure the Actions tab to define the automated tasks that run when the transition fires. See Configuring Actions.
- Select Save Changes.
Transitions left in a disabled state will remain disabled when the model is published. Disabled transitions are visible in the canvas and execution results but will not fire during model runs.
Transition tabs
| Tab | Purpose |
|---|---|
| General | Destination state, enabled/disabled status, name and description. |
| Triggers | The rule conditions that must be met for the transition to fire. |
| Actions | The automated tasks executed when the transition fires. |
Publishing the State Model
Once you have completed your draft and validated it with a simulation, you are ready to publish.
- Select Publish Model in the upper right corner of the draft state model.
- Apporetum prompts you to confirm that you have run simulations before proceeding.
- If you are confident with the configuration, select Publish Model.
Once a state model is published, it cannot be edited. The published model becomes the active configuration governing your identity landscape. We strongly recommend running a simulation before publishing.
Build a break-glass state as early as possible. Accounts that do not match any transition rule will not move between states, and a break-glass state positioned near the front of the order provides a safe fallback for edge cases. See Simulating the State Model to validate your break-glass configuration before publishing.