Entra ID (formerly Azure Active Directory) & OnPrem AD
Overview
In this article, you can find the how-to guide on configuring an app role whitin the app using the data source Entra ID (formerly Azure Active Directory) or OnPrem AD. It includes modifying current roles and adding a new role in existing apps, and adding a role in the process of configuring a new app.
If you would like to learn the basic concept of app configuration, we recommend you to read this article, App Configuration Essentials.
Role Guardrails
Role guardrails have been designed and applied in this process to strengthen the access management within your organizations or businesses. For example, during the role configuration, you can select internal users or external users under General Eligibility, to filter what users are allowed to be assigned with the role.
Internal users: Selecting this option will only allow people within the organization to be invited to this role.
External users: Selecting this option will allow people from trusted parties to be invited to this role. You can also search and add specific trusted parties in this option.
Navigate to Existing App Role Configuration
- Click Apps main menu option
- Search/find and click the app you want to configure
- Click the three dots icon on the top right corner
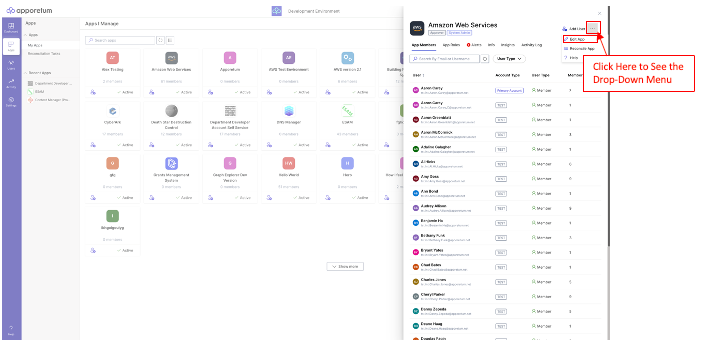
- On the drop-down menu, choose Edit App
- By default, you will land on the App Info configuration page
- Click Roles in the left menu
Modify/Remove Current Role Settings
- Choose or search for one of the current roles, then click Edit
- On the Edit Role page, you can
- (View/Edit) About section - Friendly Name, Explanation, Description
- (View) User Group section
- (View/Edit) Role Configurations section - Level of Concern (low/high), Approval Required? (Yes/No), Reconciliation Period, Access Expires, General Eligibility (internal users/external users)
- Then, choose Save changes, Remove Role or Cancel
Create a New Role in Existing Apps
- Create a new role by clicking Add role
- At the page of Add role, you can edit,
-
About section - Friendly Name, Explanation, Description
-
User Group section - Link Existing Group or Create New Group
-
Role Configurations - Level of Concern (low/high), Approval Required? (Yes/No), Reconciliation Period, Access Expires, General Eligibility(internal users/external users)
- Click Add role at the end of this page once you have finished all the required information
If role configuration is not successful, please contact system admin for further assistance.
Create a New Role in New App Configuration
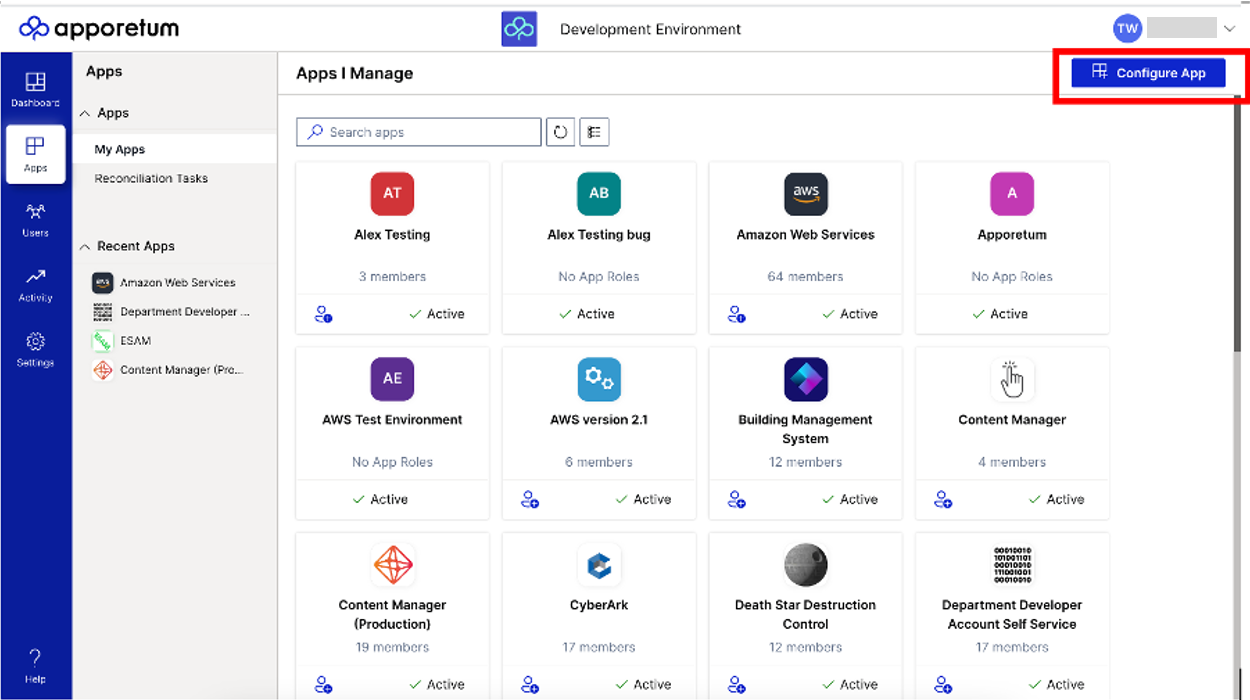
- Click Apps main menu option
- Click the Configure App option located on the top right of the page under your name
- By default, you will land on the App Info configuration page
You will need to finish the App info setting before continuing to configure role setting. You can find more information about configure app information by clicking here
-
Select the sub-menu option, Roles
-
At the page of Add role, you can edit,
-
About section - Friendly Name, Explanation, Description
-
User Group section - Link Existing Group or Create New Group
-
Role Configurations - Level of Concern (low/high), Approval Required? (Yes/No), Reconciliation Period, Access Expires, General Eligibility(internal users/external users)
- Click Add role at the end of this page once you have finished all the required information