Entra Id and OnPrem AD
Overview
In this article, you can find the how-to guide on configuring an app role. It includes adding a new role in existing apps and modifying current roles. The configuration app role processes are the same for both Entra ID and OnPrem AD, except for one situation of configuring Entra ID apps. You will be able to learn more about it in this article.
If you would like to learn the basic concept of app configuration, we recommend you to read this article, App Configuration Essentials.
Navigate to App Role Configuration
- Click Access main navigation menu option
- Search/find and click the app
- Click the three-dot icon located on the top right of the page
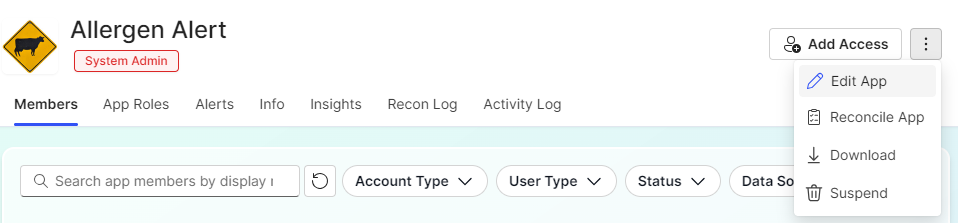
- On the drop-down menu, choose Edit App
- By default, you will land on the Config page
- Click the Roles tab
Create a New Role
You will need to finish the App info setting before continuing to configure role setting. You can find more information about configure app information by clicking here
-
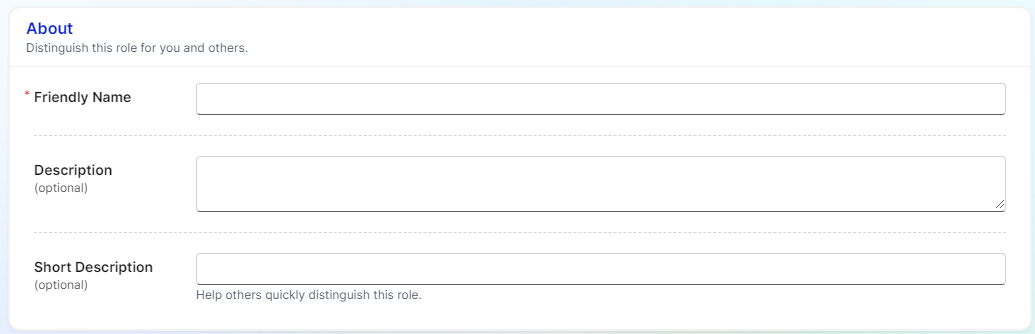
Fill in About section - Friendly Name, Explanation, Short Description
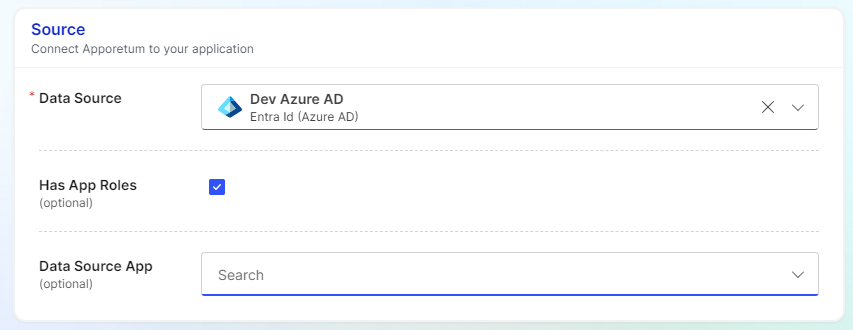
- Fill in Backing App Role section

You will only see this configuration section if you created an Entra ID app and selected Has App Role and chose Data Source App during the app configuration as follows.
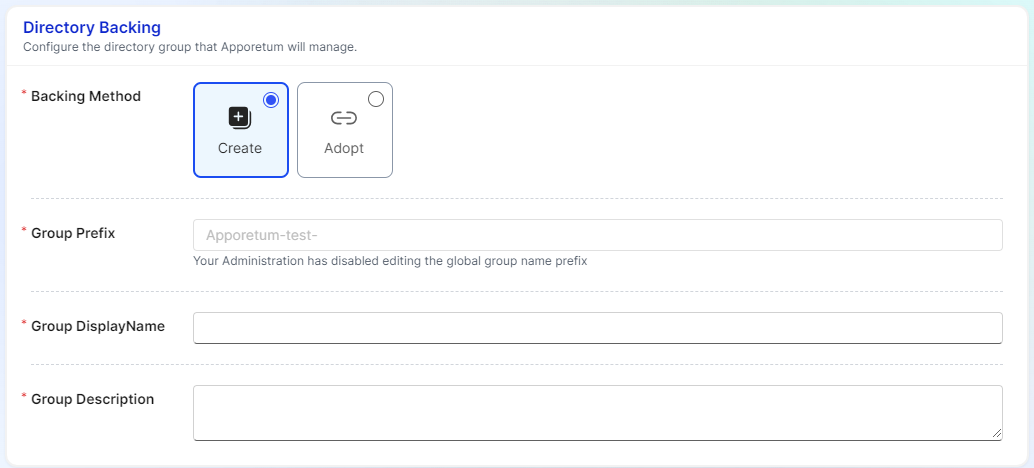
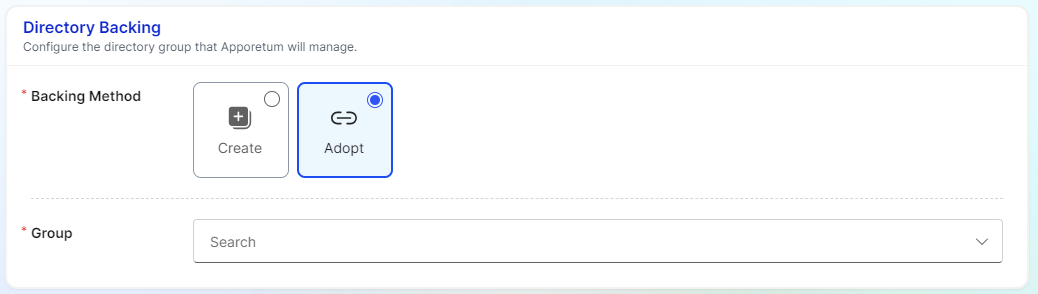
- Fill in Directory Backing section - Create or Adopt
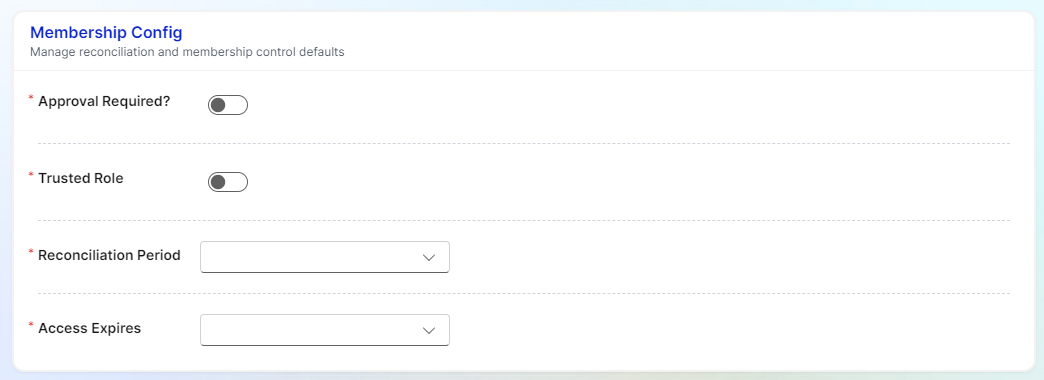
- Fill in Membership Config section - Approval Required?, Trusted Role, Reconciliation Period, Access Expires
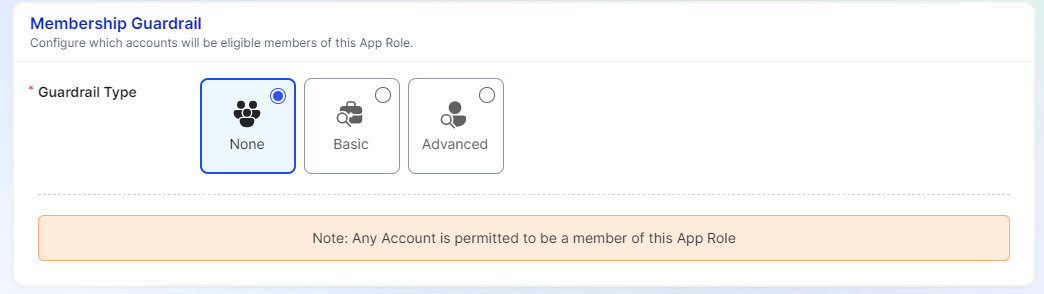
- Fill in Membership Guardrail section
- Click Save Changes
If role configuration is not successful, please contact system admin for further assistance.
Modify/Remove Current Role Settings
1.Navigate to App Role Configuration
-
Click Edit to modify the settings
-
Update the About section - Friendly Name, Explanation, Short Description
-
Update theMembership Config section - Approval Required?, Trusted Role, Reconciliation Period, Access Expires
-
Update theMembership Guardrail section
-
Click Save Changes
-
If needed, click Cancel or Delete